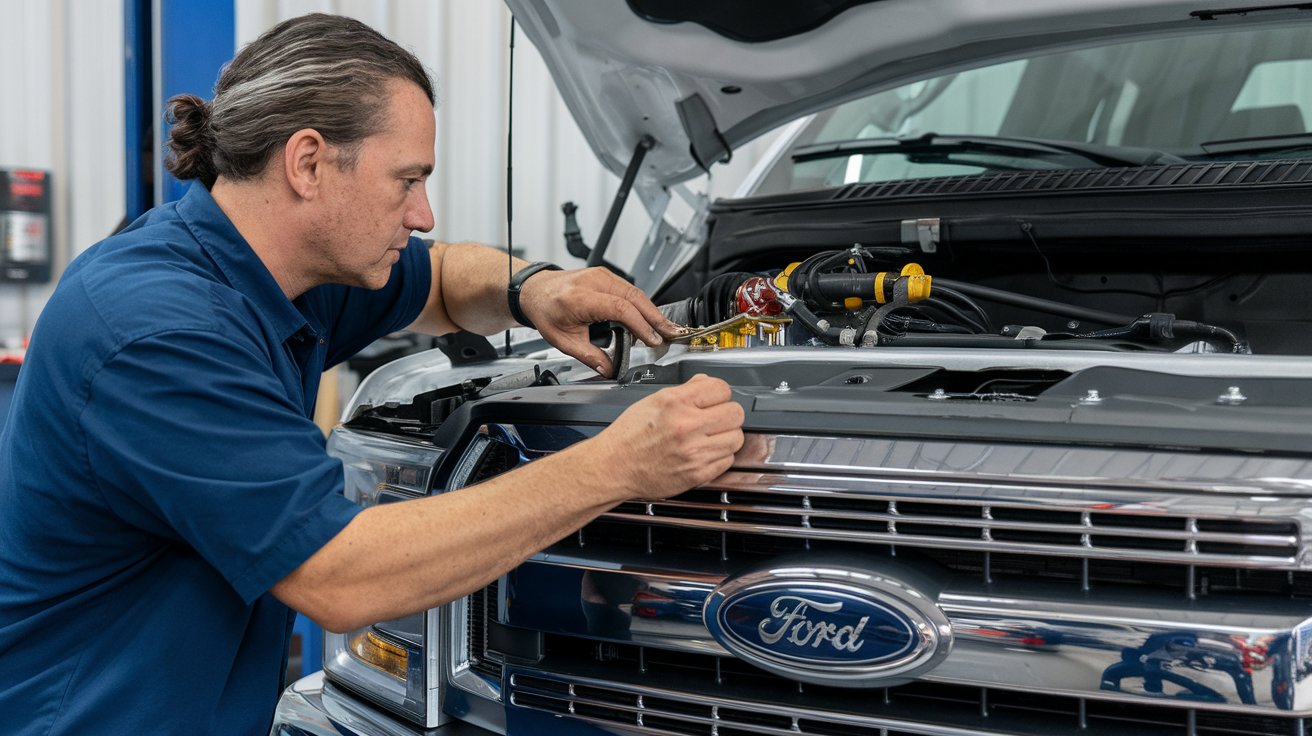
If you own a Ford F150 truck from 2004 to 2008 and have noticed a noise resembling that of an old diesel engine at idle, it might be a sign that your hydraulic cam phasers have gone bad. Cam phasers are computer-controlled camshaft gears that allow for variable cam timing in the Ford modular 3-valve truck engines. While these cam phasers provide benefits such as increased low-end torque and improved fuel efficiency, they can wear over time and cause rattles and clicking noises from the engine.
In this comprehensive guide, we will outline the step-by-step process of replacing cam phasers in the 3-valve 5.4L Triton engine of the Ford F150 models from 2004 to 2008. We will also discuss the materials needed for the job and provide essential tips to prevent cam phaser failure. So let’s dive in and learn how to fix cam phasers in your Ford F150!
Materials Needed
Before we begin, let’s gather all the necessary materials and tools for replacing cam phasers in your Ford F150. Here’s a list of items you will need:
- Metric wrench and socket set
- 1/4″, 3/8″, and 1/2″ drive ratchets, extensions, and universal joints
- 1/2″ drive breaker bar
- Impact gun (optional)
- Timing chain wedge tool
- Vise grips
- Rubber mallet
- Small pry bar
- Silicone gasket maker
- Paint pen or permanent marker
- New cam phasers and mounting bolts
- New valve cover gaskets
- Shop rags
Ensure that you have all these materials ready before starting the cam phaser replacement process.
Step 1: Remove Intake, Power Steering, and PVC Parts
To gain access to the camshaft phasers, we need to remove various engine accessories. This step can be time-consuming due to the amount of intake plumbing, wiring, and vacuum lines in the way. Follow these sub-steps to remove the necessary parts:
- Disconnect and remove the intake tube.
- Remove the bolts securing the power steering reservoir and set it aside. Remove the power steering reservoir bracket from the cylinder head.
- Disconnect the positive crankcase ventilation (PCV) tube from the valve cover.
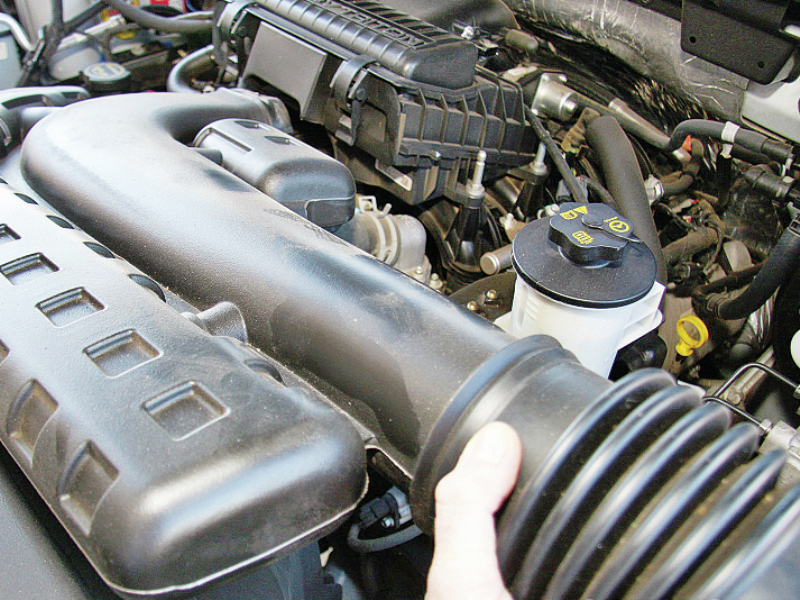
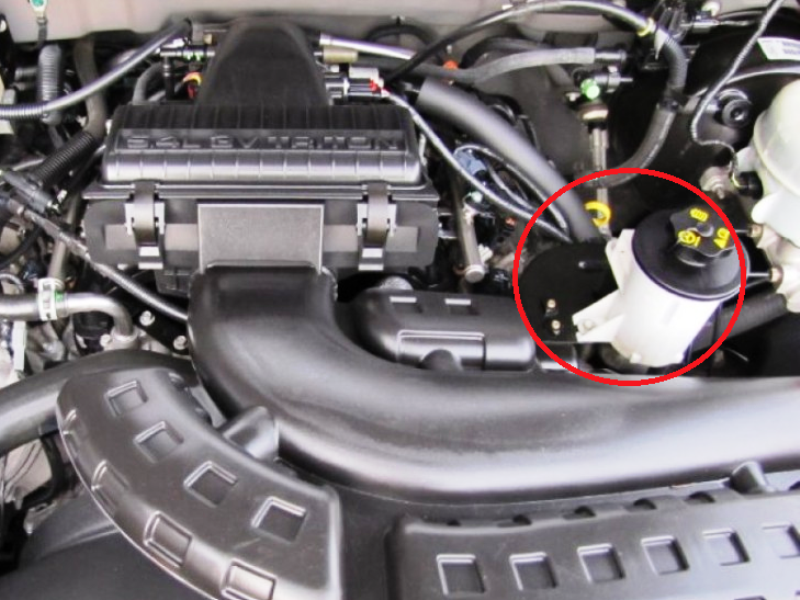
By following these steps, you will be able to remove the necessary parts obstructing access to the camshaft phasers.
Read: How to Turn Off Chime on Ford F150
Step 2: Disconnect and Remove Electrical Components
Now, it’s time to disconnect the electrical wiring that connects the computer to the ignition coils, fuel injection, and cam timing components. This will allow us to remove the cam phasers later on. Follow these sub-steps to disconnect the electrical components:
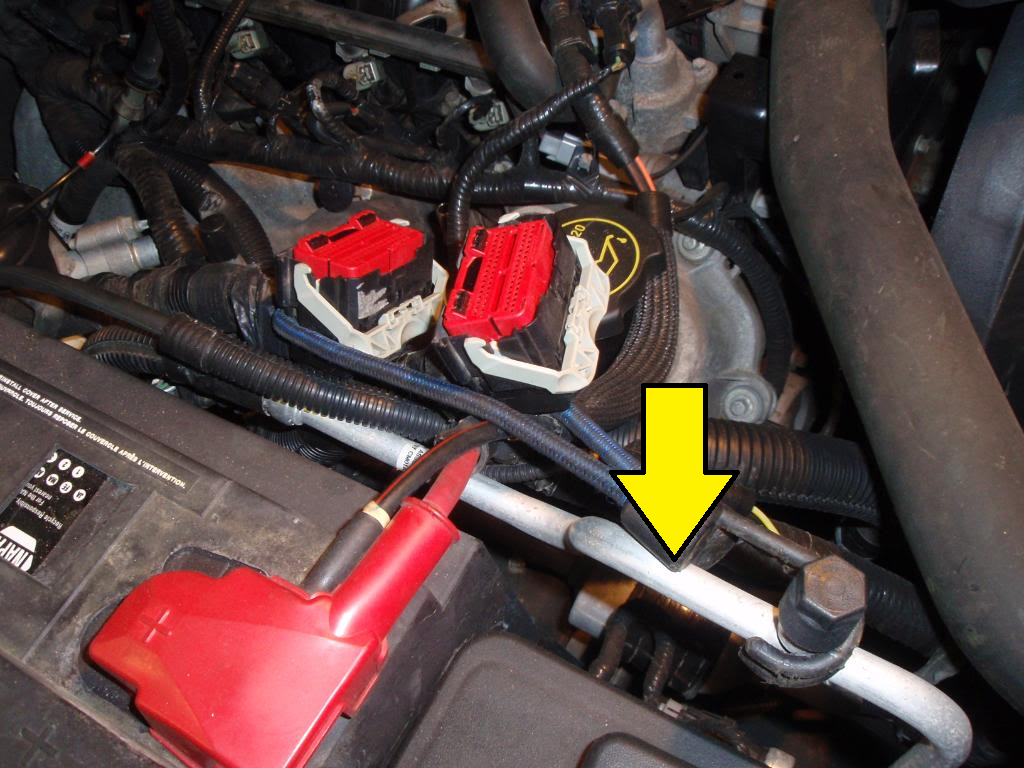
- Disconnect all main wiring harness plugs.
- Remove the fuel injectors, throttle position sensor, throttle body, and various other sensors related to fuel injection.
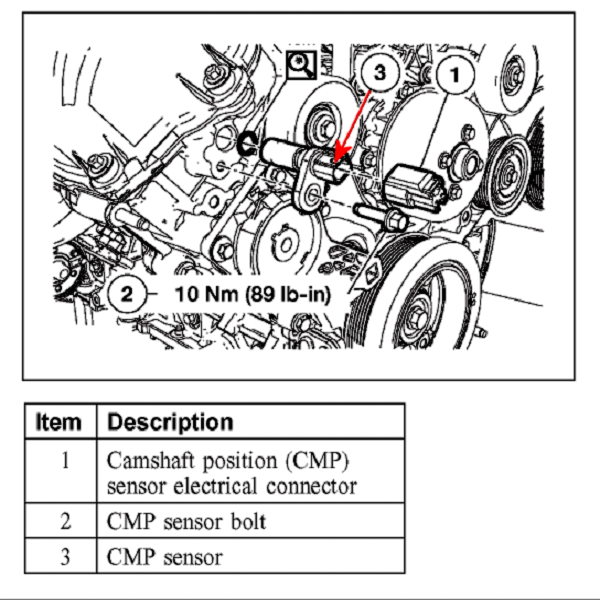
- Remove the cam position sensor hold-down bolt and remove the sensors.
- Disconnect and remove the powertrain control module (PCM) and its mounting bracket from the firewall.


Make sure to label each plug with tape and a marker to aid in reassembly later on.
Step 3: Address Passenger Side A/C Line Issues
The passenger side valve cover is obstructed by a hard air-conditioning line, making its removal difficult. There are three options to deal with this issue:
- Discharge the A/C system and disconnect the hard A/C line.
- Support the engine with a floor jack, remove the passenger side motor mount, and let the engine slightly sag for additional clearance.
- Remove the passenger side front wheel liner, battery, battery tray, and loosen the A/C drier.
Choose the option that suits your situation and proceed accordingly.
Step 4: Replace Cam Phasers
Now, we can finally replace the cam phasers in your Ford F150. Follow these sub-steps to complete the replacement process:
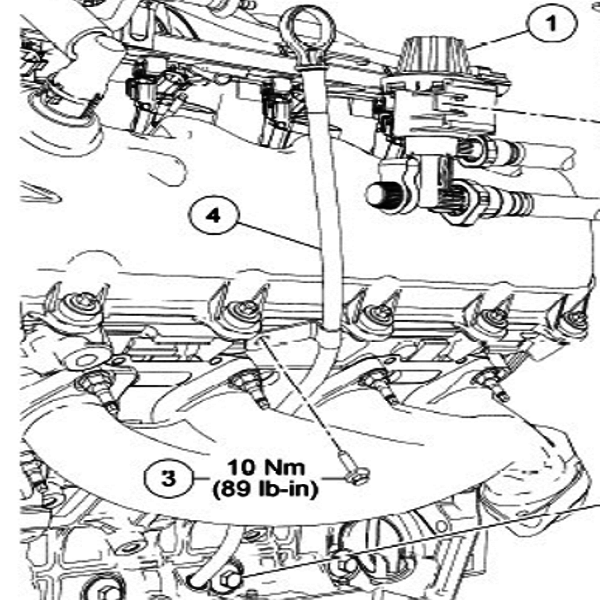
- Start by blowing off the valve covers with compressed air to remove any settled dust or dirt.
- Remove the bolts securing the valve covers to the cylinder head and carefully lift off the valve covers to avoid damaging the cam timing solenoid.
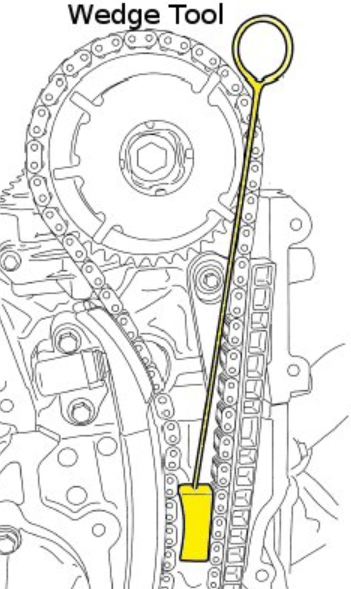
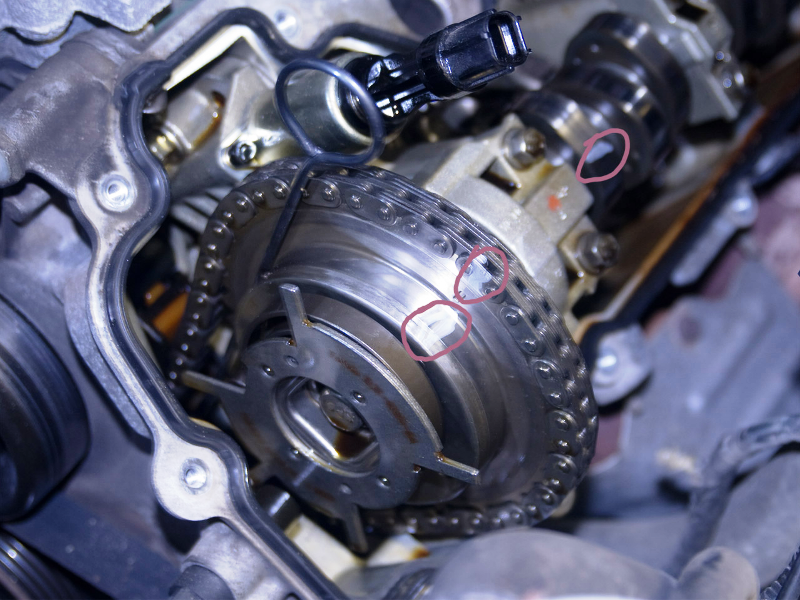
- Insert the timing chain wedge tool between the timing chain halves to lock the chain in place.
- Mark a link on the timing chain and the camshaft to ensure proper reassembly.
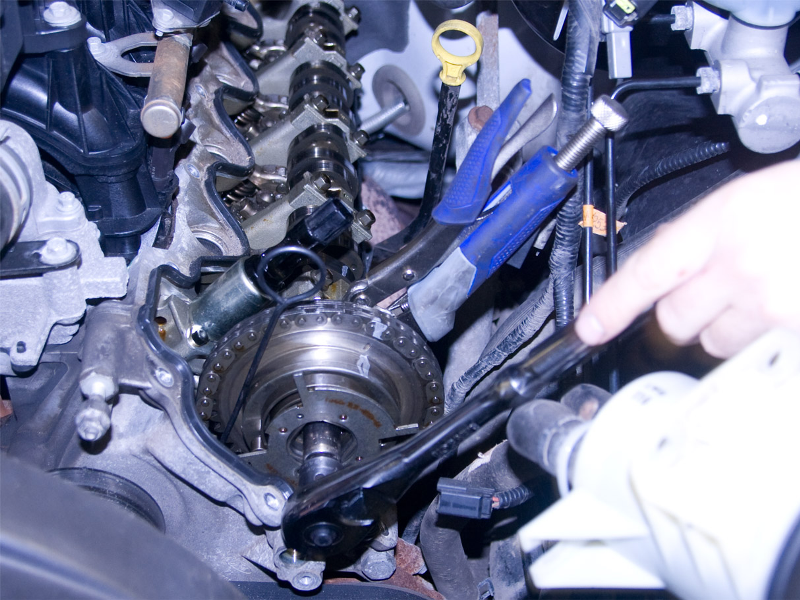
- Use locking jaw pliers (vise grips) to securely clamp onto the camshaft, if necessary, and remove the cam phaser bolt.
- Lower the phaser to release tension on the timing chain and remove the timing chain from the cam phaser sprocket teeth.
- Transfer any reference marks from the old cam phaser to the new unit for proper alignment.
- Position the new cam phaser onto the camshaft, ensuring proper alignment with the timing chain.
- Install a new cam phaser bolt and tighten it to the specified torque value.
- Remove the timing chain wedge tool and repeat the procedure on the passenger side of the engine.


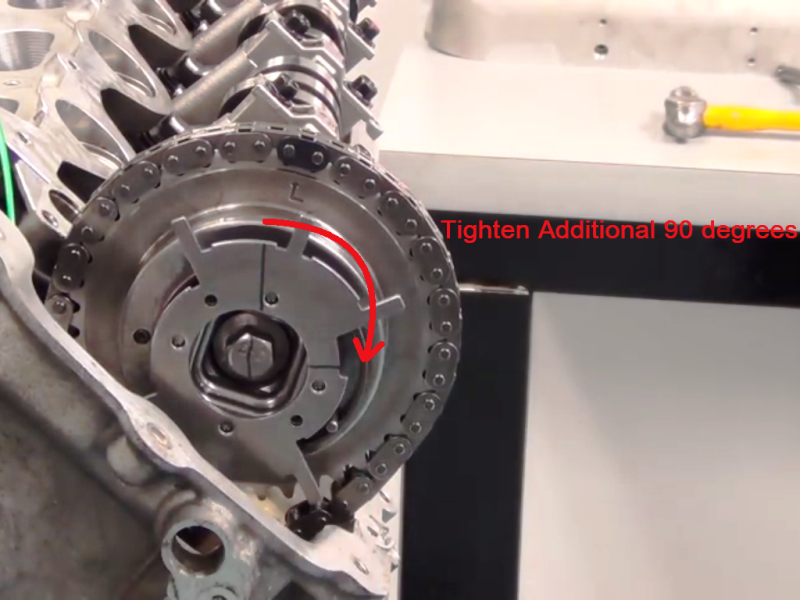
Make sure to follow the torque specifications provided by Ford for the cam phaser bolts.
Check: Ford F150 Trailer Plug Not Working
Pro Tip: Consider a Cam Phaser Lockout Kit
If you’re experiencing recurring issues with cam phasers in your Ford F150, you may consider installing a cam phaser lockout kit. These kits permanently disable the variable valve timing system, eliminating common phaser problems. The installation process for these kits is similar to the one outlined above, but a custom PCM tune is usually required. Make sure to choose a reputable kit and consult with professionals for proper installation and tuning.
Reassembly and Final Steps
After replacing the cam phasers, it’s time to reassemble the engine and its components. Follow these sub-steps to complete the reassembly process:
- Clean the gasket mating surface of the cylinder head and apply a small amount of silicone gasket maker where the timing chain cover meets the cylinder head.
- Install the valve covers and gaskets, then torque the bolts to the specified value.
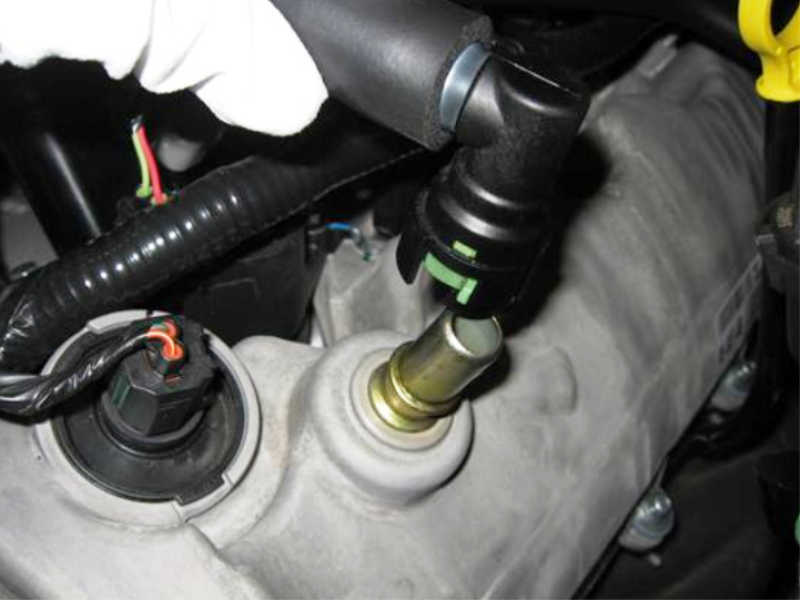
- Install the cam position sensors and torque the fastening bolts.
- Install the ignition coils and torque the bolts.
- Install the dipstick hold-down bolt.
- Reinstall the powertrain control module (PCM) and connect all wiring harness connections.
- Reattach the PCV hose to the valve cover.
- Reinstall the power steering reservoir and its bracket.
- Reattach the A/C line and recharge the A/C system, if applicable.
- If necessary, reposition and reinstall the passenger side motor mount.
- Reinstall the passenger side fender liner, battery box, battery, and A/C drier, if applicable.
- Reinstall the air intake tube.
- Reconnect the battery cables to the battery terminals.
Make sure to follow the specified torque values for each component during reassembly.
Frequently Asked Questions
Q: What are cam phasers?
A: Cam phasers are computer-controlled camshaft gears that allow for variable cam timing. They help improve engine performance by adjusting valve timing based on various driving conditions.
Q: How much does it cost to replace cam phasers on an F150?
A: The cost of replacing cam phasers can vary depending on factors such as labor rates and the specific model year of your F150. On average, the cost ranges from $500 to $900 for cam phaser replacement.
Q: What happens when cam phasers go bad in a Ford F150?
A: When cam phasers go bad, you may experience rattles and clicking noises from the engine, decreased performance, and potential valve timing issues. It’s important to address cam phaser problems promptly to prevent further engine damage.
Q: How long does it take to replace cam phasers in a 5.4 Ford?
A: The process of replacing cam phasers in a 5.4 Ford engine can take approximately 1 to 2 days, depending on your level of experience and the specific circumstances of the job.
Q: Why do cam phasers fail in Ford F150?
A: Cam phasers can fail due to issues such as improper oil control, sludge buildup, and problems with the engine’s computer system. Regular maintenance and using high-quality oil can help prevent cam phaser failure.
Conclusion
Replacing cam phasers in your Ford F150 can be a challenging task, but with the right tools and knowledge, it’s a job that can be completed successfully. By following the steps outlined in this guide, you can fix cam phasers and ensure optimal engine performance. Remember to use high-quality cam phasers, adhere to torque specifications, and consider a cam phaser lockout kit if needed. With proper maintenance and timely repairs, you can keep your Ford F150 running smoothly for years to come.
Additional Information: It’s important to note that if you’re not confident in your abilities to replace cam phasers yourself, it’s best to consult with a professional mechanic. They have the expertise and specialized tools to ensure the job is done correctly and safely.


